So, have you just bought a new clipper, or blade and found out it’s nothing but trouble? There is a fix for that. What happens most often when a clipper or the blade seems “off” that is exactly what it is.
If any part of the blade portion of your clipper isn’t aligned quite right it can make grooming a giant pain. What is worse if certain parts of it are loose they can make grooming a painful experience for your dog. How can we make sure this does not happen?
Here we are looking at how to set, adjust, and change dog clipper blades. With a ton of reasons for any one of these to be done, we can look at each separately. It does not stop with just a how to though. Brands have to be treated differently which can cause some problems.
How to set and adjust dog clipper blades
What you are working with if you are looking up how to set and adjust dog clipper blades is not simply a snap on the blade. These come in a variety of sizes and vary by brand.
If you are working with an Oster, Wahl, Laube or even a Conair don’t plan that anyone adjustment method will work on any other brand. For instance adjustments on an Oster will likely not work on a Conair.
The good news at the end of the day is that after adjusting your clippers often enough you will develop a well-practiced hand. Like all other aspects of grooming, practice does improve your work.
Identifying Brands and Blades
What if you are using different clippers? Different blades? What if you have a fluffy small dog and a large wire-haired pup those have different grooming needs?
It is pretty easy, you just keep your clippers separate. Then keep the blades with each clipper. Many groomers have their blades color coded so that if the blades ever do get mixed up you can sort them out. Thankfully one tip that works for any brand or blade size is to be sure your clipper is unplugged.
Step 1: Disassembly
Now that you know to keep your brands and their blades separate, and to keep your clipper unplugged when adjusting the blades.
You might be initially inclined to pull apart the whole blade portion of your clipper. But, is it necessary? No, not really. So what’s the anatomy of a clipper blade here? Well, if you were to pull the whole thing apart you will have this order:
- Spring
- Guide
- Socket
- Cutter
- Comb
- Screws
So a few important bits of information for how to handle adjustments. Immediately check that your comb doesn’t wiggle or really move at all.
Step 2: Adjustments
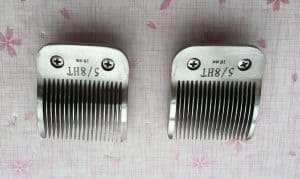
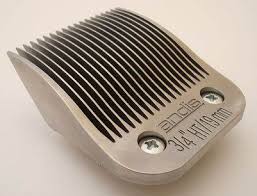
After checking the comb, what needs attention is the “ears” that poke out from the top of the comb. These are going to be used to put some tension on the comb after the blade is fitted on. They will also serve to eliminate any movement from the comb.
It is this whole part of the device that varies from one brand to the next. Although they can almost all be disassembled the same way, the handling of them is different.
Set the blade onto the comb and pull the “ears” that poke through both layers together slightly. You can use needle-nose pliers and apply a tiny bit of pressure.
A little pressure can really go a long way. While it’s important to create the right level of tension, these sockets that poke out and are the “ears” are delicate.
Why could you avoid the comb wiggle? Well, because it starts to pull at hairs and fur as it trims. When you are ready to examine the comb and are sure it can’t move with you applying pressure manually, turn on the clippers. Watch the comb closely for a few moments to watch for any movement.
What if it’s still moving? How much tension is too much? Is there a shortcut out there to make this go away? Unfortunately no, there isn’t a shortcut. There isn’t a hack or quick trick. This slow tweaking of the tension will probably take you a few tries to really get the technique down.
Fixes
So, we mentioned earlier that sockets break all the time. It is frustrating for a new groomer or someone just learning their clippers to break sockets it isn’t the end of the world.
What can you do? Replace them. It is a very simple process and even if you do not ever actually break them they will eventually need to be replaced.
The sockets, or “ears” that poke through the comb and blade for you to increase or decrease tension can get “metal fatigue”. This means that after some time and a few adjustments you’ll find they don’t sit will in place anymore.
You may notice the sockets requiring more and more tightening. Another sign of this is that you find yourself tightening the ears into different directions.
Changing Out Blades
This part is pretty easy compared to adjustments. So you want to start with the same step of making sure the clippers aren’t plugged in and then follow these simple steps:
- Face the teeth of the clippers away from you.
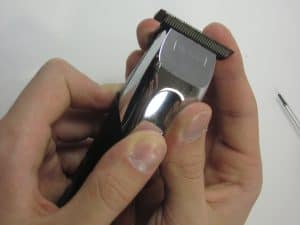
- With both thumbs push forward and upward on the blade. (This should make it come off easily).
- If necessary, take the hinge out by using a flathead screwdriver to pry out the tongue.
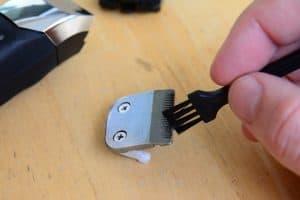
- Clean all parts while the blade is disassembled.
- Face the teeth away from you and slide the new blade straight down! Be very careful!
- Steady the plastic grips and click into place.

Everything You Needed
Now that you can change and adjust your blades you’ve taken on the freedom of being able to service your own clippers. Now you know how to set, adjust, and change dog clipper blades. It’s a great opportunity to break away from going to the groomers every six weeks and learn how to take on this life skill of grooming yourself.


